
How to generate ticket on Mosadaqa step by step information – Introduction to Mosadaqa Ticket Generation Process
Generating a ticket on Mosadaqa is a critical step when you need to resend, update, or extend your verification request. Many users face confusion at this stage, especially when their request is incomplete or pending. In this guide, we provide a clear, step-by-step walkthrough based on actual system screens, ensuring you can successfully generate and submit your Mosadaqa ticket without errors.
Step 1: Login to Your Mosadaqa Account
We begin by accessing the official Mosadaqa portal:
- Enter your registered email and password
- Click on Sign In
- Wait for the dashboard to load
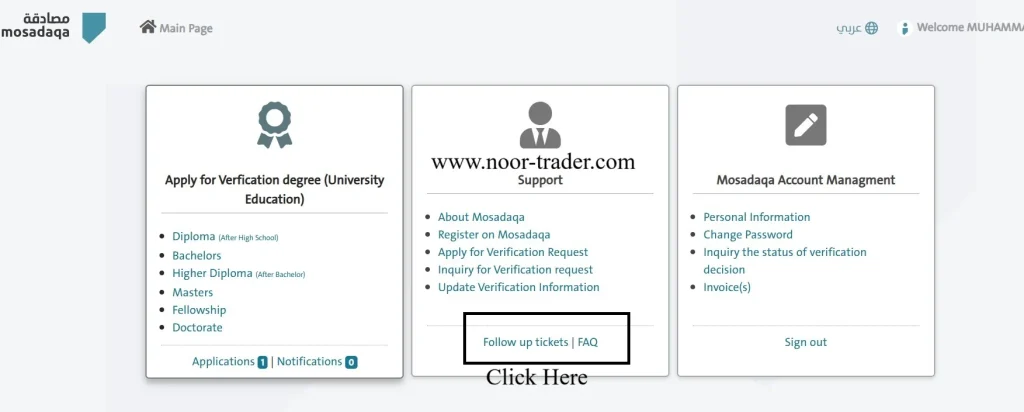
Step 2: Click on “Update Verification Information”
From the dashboard:
- Locate the option “Update Verification Information”
- Click on it (as highlighted in the image)
This section is specifically used to:
- Modify submitted applications
- Respond to deficiencies
- Generate tickets for incomplete requests
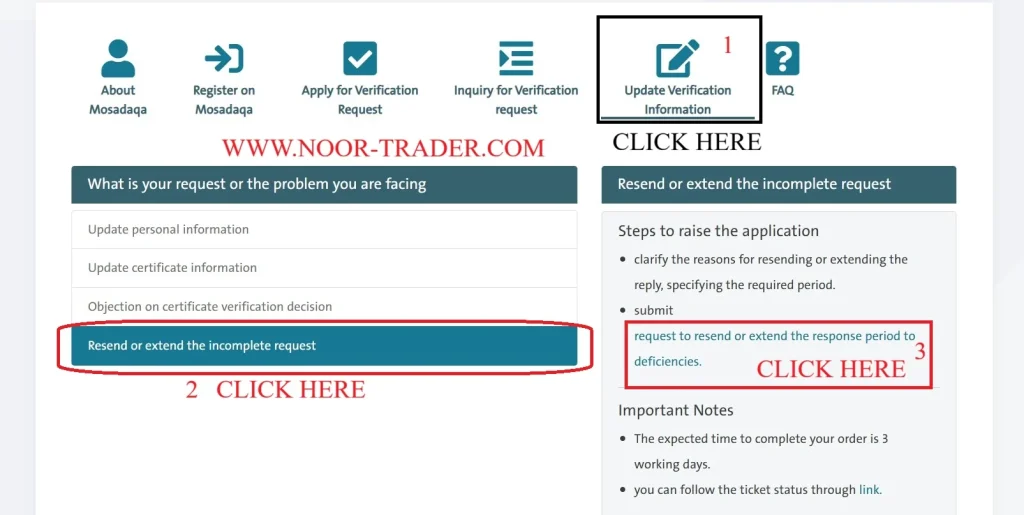
Step 3: Select “Resend or Extend the Incomplete Request”
After entering the update section:
- You will see multiple options like:
- Update personal information
- Update certificate information
- Objection on verification decision
- Resend or extend the incomplete request
👉 Click on “Resend or extend the incomplete request”
This is the correct option for generating a support ticket related to pending or incomplete applications.
Step 4: Click on “Request to Resend or Extend the Response Period”
On the right side of the screen:
- You will find instructions under Steps to raise the application
- Look for the clickable option:
👉 “Request to resend or extend the response period to deficiencies”
Click this option to proceed further.
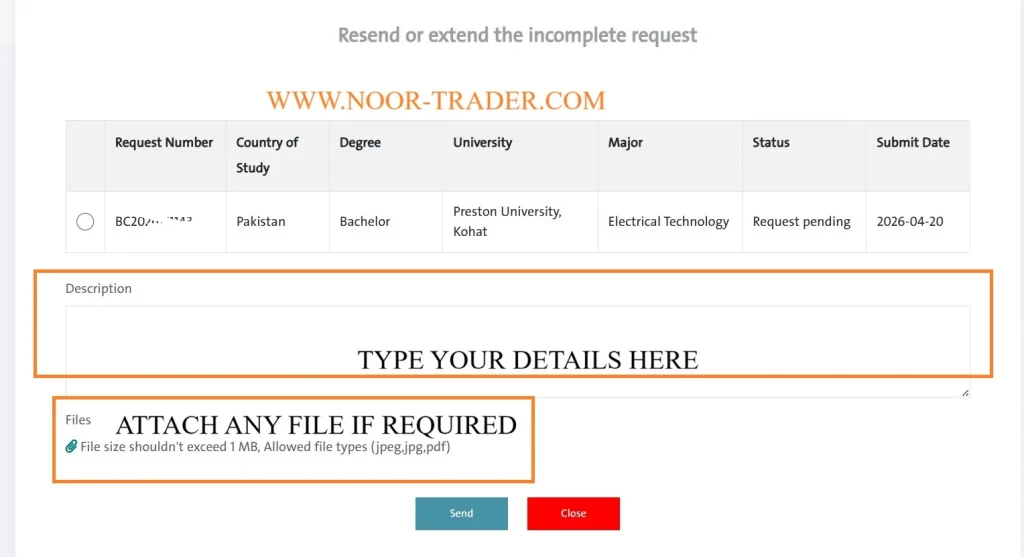
Step 7: Attach Supporting Documents (If Required)
Below the description box, you will find the File Upload Section:
👉 “ATTACH ANY FILE IF REQUIRED”
Important guidelines:
- File size must be less than 1MB
- Allowed formats: JPEG, JPG, PDF
Attach documents such as:
- Missing certificates
- Supporting letters
- Clarification documents
Step 8: Submit the Ticket
Once all details are complete:
- Click on the “Send” button
- Wait for confirmation
Your Mosadaqa ticket will be successfully generated, and your request will be submitted for review.
Step 9: Track Your Ticket Status
After submission:
- Go back to dashboard
- Click on “Follow up tickets | FAQ”
- Monitor updates related to your request
This allows you to:
- Check progress
- Respond to further queries
- Stay updated on approval status